Thursday, 2 December 2010

Monday, 29 November 2010
Monday, 15 November 2010
Evaluation 1
In what ways does your products use, develop, or challenge media forms and conventions of real media products?
Friday, 12 November 2010


Tuesday, 2 November 2010
Bloopers
There was some funny moments during filming which I couldn't add to the overall trailer so therefore I decided to make a quick bloopers video including interviews.
Doing this blooper helped me develop my sound editing skills by using different levels to make the non diegetic sound quieter during dialogue being spoken, I also managed to develop my skils creating voice overs ready for the my real trailer to see how they could be constructed and to place them into the timeline when needed. I also messed around with the speed of some of the clips to make the sounds of Bryony squeaky to add a comedy effect. I also reduced speed to make some scenes go in slow motion to create a tense effect.
Doing this blooper helped me develop my sound editing skills by using different levels to make the non diegetic sound quieter during dialogue being spoken, I also managed to develop my skils creating voice overs ready for the my real trailer to see how they could be constructed and to place them into the timeline when needed. I also messed around with the speed of some of the clips to make the sounds of Bryony squeaky to add a comedy effect. I also reduced speed to make some scenes go in slow motion to create a tense effect.
Thursday, 28 October 2010
Institutional credits
Going back looking at film trailers I realised a lot of them had these at the end of their trailers, I haven't considered adding one to mine until now, I feel I should include one as it gives credit to the people who helped make it but also will make the trailer look more professional.
Below is two examples they include the various production, broadcasting companies, and people who contributed to the music. But also includes the actors in the films. Some also include the logos. I also have included my design at the bottom
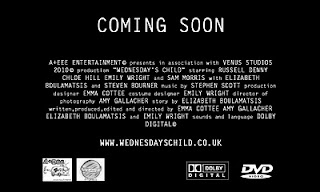
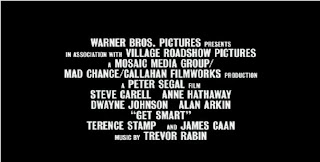
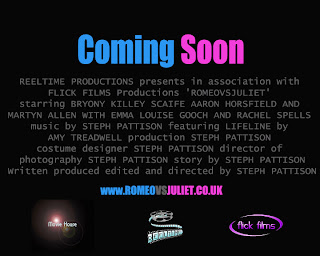
Below is two examples they include the various production, broadcasting companies, and people who contributed to the music. But also includes the actors in the films. Some also include the logos. I also have included my design at the bottom


Tuesday, 12 October 2010
Tuesday, 5 October 2010
Change of plans
I decided to change the opening scene to make it more interesting, this involved having to re-storyboard my ideas and editing the script but overall the new improvement is shorter and gets straight to the point expressing the hate the families have for eachother this is represented visually but with captions too.

New script
Romeo Vs Juliet script
Scene 1
(Simple longshot of two houses in split screen, possibly with a blue and pink tint to distinguish between the two)
(fades)
Caption appears Two households
(fades)
(medium shot of family at table eating, talking about the enemy)
Bryony: Bet the _______ don’t eat as a family (trying to act smart)
Dad: (stands up and bash his fists on the table) I dont give a damn about what that family does!
Caption Sworn enemies
(Aaron sitting at table doing his work quietly upset)
(mother stood at the camera, looking worried)
Mother: why the sadface
Aaron: it doesnt matter
Mother: You have been bullied again! I’m sick of that family!
Caption but what happens when
Scene fades
(Aaron walking towards a group of girls, they begin to push him around calling him names)
Caption when fate plays against them
Zooming in to an alarm clock
(close up of characters getting up and looking confused, turn there heads and scream)
Explode transition
Caption being eachother
Below is the new scene on the story board. 


New script
Romeo Vs Juliet script
Scene 1
(Simple longshot of two houses in split screen, possibly with a blue and pink tint to distinguish between the two)
(fades)
Caption appears Two households
(fades)
(medium shot of family at table eating, talking about the enemy)
Bryony: Bet the _______ don’t eat as a family (trying to act smart)
Dad: (stands up and bash his fists on the table) I dont give a damn about what that family does!
Caption Sworn enemies
(Aaron sitting at table doing his work quietly upset)
(mother stood at the camera, looking worried)
Mother: why the sadface
Aaron: it doesnt matter
Mother: You have been bullied again! I’m sick of that family!
Caption but what happens when
Scene fades
(Aaron walking towards a group of girls, they begin to push him around calling him names)
Caption when fate plays against them
Zooming in to an alarm clock
(close up of characters getting up and looking confused, turn there heads and scream)
Explode transition
Caption being eachother
Wednesday, 29 September 2010
Photos of me Filming

This is various pictures from the filming including the scene with the 'geeks' Dan and Josh, whilst I was filming my friend Bryony was taking the photos for me. Theres some various shots of when I am filming and when I am discussing with the boys about how they did and what could be improved. There is also a tracking shot where the boys are running towards me and I have to keep the same pace and movement to make me seem like Aarons character backing away.
Then there is some on the same day when I turned round and film Aarons reaction to what the boys said and him running.
I am also shot of producing the 'love' scene, the photos were taken by Dajana, displaying me filming handheld of the two characters these being mainly overshoulder shots, but also there is some featured from my the actors point of view just before filming.
Latest News
- Due to Aaron not being able to make it to Richmond river on the 29th September due to restrictions with his bus pass. I will be shooting scene 36-39 at Coronation Park near to where he lives. This also features a river and I will produce a recce of this location. The weather may be a restriction to filming.
Tuesday, 28 September 2010
Skills development improvement
This is my latest improvements on my skills development, I learnt how to add text to images this is evident as I included peoples names and how they connect to media as they are talking. I also learnt how to import my own logos to see how they would turn out before adding them to my real trailer.
In terms of sound I developed my skills of changing different volumes by using the 'toggle clip overlays' which allowed me turn the non diegetic music down when different people were being interviewed, so we could hear there statements clearly.
Issues (filming)
I was planning to film the last scenes on Tuesday the 28th September but due to my actor being unavailable I will be doing this on the 29th. But to overcome the problem I have decided to film different scenes on the 28th which have different actors so I am doing something towards my work for the deadline.
Thursday, 23 September 2010
Issues surrounding soundtrack
My teacher announced that OCR would like us to produce our own music or get permission from an unsigned band, this will put back my production slightly as out of the music I'm using only one from an unsigned artist therefore I will need to work on Garage band in my frees to create some music.
I struggled to make music on garage band, but as a back up I email a girl off youtube who is unsigned to see if I can use a song she sang.
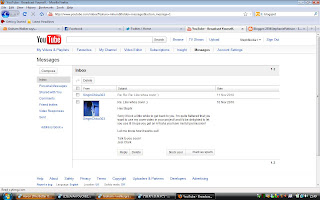
This is evidence of Jesi letting me use her song cover :)
And below is the video I found of her :) with the desired song, I think it fits well as it mentions a rollercoaster which represents the two characters in the trailer being thrown into an uncomfortable moment.
I struggled to make music on garage band, but as a back up I email a girl off youtube who is unsigned to see if I can use a song she sang.
This is evidence of Jesi letting me use her song cover :)

And below is the video I found of her :) with the desired song, I think it fits well as it mentions a rollercoaster which represents the two characters in the trailer being thrown into an uncomfortable moment.
Wednesday, 22 September 2010


Construction logos
I began to create my logos which was then put into my skills development video. Whilst experimenting on photoshop I found some techniques I could add to the logos I designed so therefore I created some alternative ideas which I placed on my Facebook focus group to get some comments. All of the logos were made in photoshop at 720 pixels by 576 pixels at 72DPI .
Main title Logo

Reeltime Logo



This will be used as the main title for my overall trailer. It is simplistic and easy to read in a short space of time, I used a girly decorative font (dafont.com) which displays feminisity but also this has been placed saying 'Romeo' to give clues of what the narrative is about likewise with the 'Juliet' another font from (dafont.com) which displays a masculine look.
I put a simple font for the Vs in black so it is recognised on the logo and shows that the characters dont get along.
Reeltime Logo
This is the main production logo for my trailer, I found a movie reel online and used photoshop to edit the image to make it my own. I done this by using the gradient tool (blue and white) in the squares to give it a cool effect and modernised look but also it makes the image a lot brighter. I then used the wand tool and switched the colour to black, after selecting the parts I wanted I used the paint bucket to fill in the reel strip to make the image stronger rather than leaving it grey.
For the font I went onto a site called 'dafont.com' to download some fonts for the various logos, the font being called Bellerose this gives the image a professional look, I had to resize the different letters to fit them into the blue squares and displays the effect what old films used to have when they would display the different numbers on a film reel. (see example)
Flick films logo

Flick films is going to be the distribution company, I created there logo by starting off with a black background using the paint bucket tool. I then created the curved shape and used duplicate layer to get the exact same shape. To get one of the shapes to be upside down I used the transform tool to flip it horizontal and vertically. I then selected each shape individually and used the gradient tool with purple and white to give a faded effect.
For the title I went onto 'dafont.com' and found the font star avenue, I then used the gradient tool again to match the title with the shapes. For the shapes to fit around the type I used free transform to adjust the size and position of the shapes. The shapes weren't standing out very well so I used layerstyle to find improve it using outer glow by changing the colour to purple and experimenting with the size and noise creating a border/outline.
Movie house logos.

I have made two logos for Movie House as I was experimenting with the different filters and came across the lens flare which looked quite effective on a black background, so I created two versions and then I will put them both on Facebook for my focus group to decide.
The first image with the directors chair has also got a grey/black background so the spotlight is more noticable and makes the image stand out. I found the image of the directors chair online and did some editing to the image to make it my own by adding more colour to it and some text on the chair .
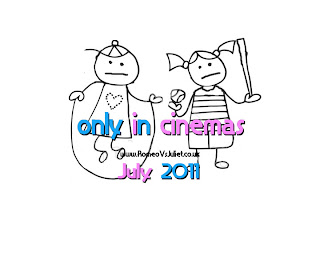
Only in cinemas logos.
I have done two variations on the only in cinemas logo, the first one being on a black background with a spotlight in the corner using the filters gives a professional but film like appearance but also helps highlights the importance of the information. The text is in blue and pink to add to the theme of bodyswap. I have also provided a date of the films release so this indicates to the audience to when they can see it. But also a website if they want to find out more about the film before seeing it.

The second logo is on a white background with the same font as they first one so the body swap idea is still recognised. However there is an image on this logo, which looks like a childs drawing but the heads on the boy and girl have been swapped with upset faces which keeps the idea going and gives away what the trailer is about and can be used as a memorable image. I didn't colour the image as it may distract the audience from the information provided.
Thursday, 2 September 2010
Progress review
Below is a progress review by my teacher

Then I created my own progress review in response to my teachers.


Thursday, 26 August 2010
Skills development
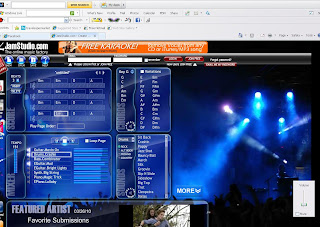
amstudio music tryout:
I have tried making a soundtrack on jamstudio.com it was going well, I was learning how to add chords and different instruments into my composition but then the programme wouldnt let me save the work I created as I had to pay for the music, which was in dollars but also very expensive. So at least I got some experience of how to make a soundtrack.
Teesside university visit
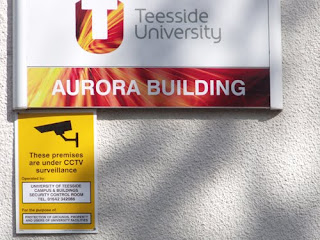 To learn new skills in filming and editing to aid my coursework I attended the workshop in Teesside at the university. Attending the Teesside university trip was to find out some tips on how to film such as framing, focus, speed, lighting and colour. But later on in the session I got a chance to edit an existing film trailer to learn the basic editing skills to go towards my production.
 To add to our knowledge of equipment and how to set up tri-pods correctly and how
Sound- I also learnt how to improve the sound in my production with the use of a gun mic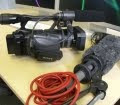 which aims to stop unwanted noises such as if I was filming outside the wind could be stopped as it is used mainly to capture dialogue or loud noises such as maybe a door slamming, to get this effect I would simply have to get the mic as close to the person or object without it being shown in the shot. To capture good quality dialogue or sound.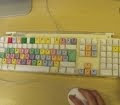
During the making of the video edit I learnt how to log and capture my work correctly and how to set the scratch disks so my work wouldnt get lost and I would have to start all over again. I also learnt how to cut clips to take out the unwanted parts I did this by alligning the cut tool to the footage and clicked then deleted what I needed to.
I also learnt how to add music to the footage by importing the file and rendering it, but also if I want dialogue to be heard I could adjust the sound at the appropriate times.
This will help me with my trailer as I never used final cut before so I know have some basic skills to help me make my trailer more professional.
I have tried making a soundtrack on jamstudio.com it was going well, I was learning how to add chords and different instruments into my composition but then the programme wouldnt let me save the work I created as I had to pay for the music, which was in dollars but also very expensive. So at least I got some experience of how to make a soundtrack.

Teesside university visit
 To learn new skills in filming and editing to aid my coursework I attended the workshop in Teesside at the university. Attending the Teesside university trip was to find out some tips on how to film such as framing, focus, speed, lighting and colour. But later on in the session I got a chance to edit an existing film trailer to learn the basic editing skills to go towards my production.
 Using the camera 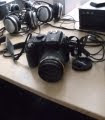 - It is important to keep checking your framing in each shot so you can keep the proportion right but also every location and action is different so this is another factor I need to keep in consideration. In terms of focus I must be aware when using the camera the image can come out of focus slightly, but zooming in on the desired object can refocus it to make it less blurry. We also looked at colour and how to adjust the white balance which will improve the quality and brightness in dull settings to give it more vibrance and a clear shot to make it look professional for the trailer.
We later went out to film some scenes and learnt how to variate camera movements such as panning and tilting which will help me with my production because I will have the skills to pull off different camera techniques successfully and correctly to result in a professional, creative end product.
 - It is important to keep checking your framing in each shot so you can keep the proportion right but also every location and action is different so this is another factor I need to keep in consideration. In terms of focus I must be aware when using the camera the image can come out of focus slightly, but zooming in on the desired object can refocus it to make it less blurry. We also looked at colour and how to adjust the white balance which will improve the quality and brightness in dull settings to give it more vibrance and a clear shot to make it look professional for the trailer.
We later went out to film some scenes and learnt how to variate camera movements such as panning and tilting which will help me with my production because I will have the skills to pull off different camera techniques successfully and correctly to result in a professional, creative end product.
 To add to our knowledge of equipment and how to set up tri-pods correctly and how
to adjust the tri-pod legs etc, this will improve my future filming because I will know how to keep a good angle without the overall image being an unwanted tilt. I learnt how to use ND filters to improve the lighting when filming especially inside which makes the image clear and easy to see whats going on in the shot.
Sound- I also learnt how to improve the sound in my production with the use of a gun mic
 which aims to stop unwanted noises such as if I was filming outside the wind could be stopped as it is used mainly to capture dialogue or loud noises such as maybe a door slamming, to get this effect I would simply have to get the mic as close to the person or object without it being shown in the shot. To capture good quality dialogue or sound.
Editing- We then began to edit our foota
ge to make a sequence we used transitions, the slice tool to get the better parts of footage to connect with the next shot which will be needed in my actual production. Me and my partner Aaron began to add some music from gladiator to make the footage come to life and discovered how much music gives to the final output to make it lifelike. This affects my production as I will need music to represent the different moods in the trailer.
But later we created a trailer for the existing film Gladiator using the actual footage, we experimented by adding interviews from the director and cast, but also trying to add sound in the background quietly so we can still hear the people talking in the interview this will help with my production because mine will have a lot of dialogue to represent the characters feelings being stuck in eachothers bodies. I also learnt that you could speed up and slow down certain footage to create an interesting effect such as in my production I have a shot of zooming into a characters mouth when screaming I could speed this up to prevent too much time on that scene.
But later we created a trailer for the existing film Gladiator using the actual footage, we experimented by adding interviews from the director and cast, but also trying to add sound in the background quietly so we can still hear the people talking in the interview this will help with my production because mine will have a lot of dialogue to represent the characters feelings being stuck in eachothers bodies. I also learnt that you could speed up and slow down certain footage to create an interesting effect such as in my production I have a shot of zooming into a characters mouth when screaming I could speed this up to prevent too much time on that scene.
Trailers- I learnt quite a lot during the Teesside media workshop because I have never created a trailer before so now I have some idea of how to make it exciting and well presented. The key components I should consider when editing are sound, speed, transition and effects. Sound will improve the emotion of my work making it more real but also display the feelings and emotions in the scene. Speed and length of particular shots are important as I want to make the trailer exciting and not long and boring. Transition is another important idea when editing the trailer as I need to know how scenes are going to lead to others smoothly. If I need any effects such as brightness, black and white etc, if I need to improve the quality of the film I can easily do this in the editing phase. I may include some test shots in my blog and focus group to get comments on how to improve shots and what else can be added to make them look better.
Video editing exercise
During the making of the video edit I learnt how to log and capture my work correctly and how to set the scratch disks so my work wouldnt get lost and I would have to start all over again. I also learnt how to cut clips to take out the unwanted parts I did this by alligning the cut tool to the footage and clicked then deleted what I needed to.
I also learnt how to add music to the footage by importing the file and rendering it, but also if I want dialogue to be heard I could adjust the sound at the appropriate times.
This will help me with my trailer as I never used final cut before so I know have some basic skills to help me make my trailer more professional.
ge
Subscribe to:
Posts (Atom)