I have tried making a soundtrack on jamstudio.com it was going well, I was learning how to add chords and different instruments into my composition but then the programme wouldnt let me save the work I created as I had to pay for the music, which was in dollars but also very expensive. So at least I got some experience of how to make a soundtrack.

Teesside university visit
 To learn new skills in filming and editing to aid my coursework I attended the workshop in Teesside at the university. Attending the Teesside university trip was to find out some tips on how to film such as framing, focus, speed, lighting and colour. But later on in the session I got a chance to edit an existing film trailer to learn the basic editing skills to go towards my production.
 Using the camera 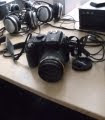 - It is important to keep checking your framing in each shot so you can keep the proportion right but also every location and action is different so this is another factor I need to keep in consideration. In terms of focus I must be aware when using the camera the image can come out of focus slightly, but zooming in on the desired object can refocus it to make it less blurry. We also looked at colour and how to adjust the white balance which will improve the quality and brightness in dull settings to give it more vibrance and a clear shot to make it look professional for the trailer.
We later went out to film some scenes and learnt how to variate camera movements such as panning and tilting which will help me with my production because I will have the skills to pull off different camera techniques successfully and correctly to result in a professional, creative end product.
 - It is important to keep checking your framing in each shot so you can keep the proportion right but also every location and action is different so this is another factor I need to keep in consideration. In terms of focus I must be aware when using the camera the image can come out of focus slightly, but zooming in on the desired object can refocus it to make it less blurry. We also looked at colour and how to adjust the white balance which will improve the quality and brightness in dull settings to give it more vibrance and a clear shot to make it look professional for the trailer.
We later went out to film some scenes and learnt how to variate camera movements such as panning and tilting which will help me with my production because I will have the skills to pull off different camera techniques successfully and correctly to result in a professional, creative end product.
 To add to our knowledge of equipment and how to set up tri-pods correctly and how
to adjust the tri-pod legs etc, this will improve my future filming because I will know how to keep a good angle without the overall image being an unwanted tilt. I learnt how to use ND filters to improve the lighting when filming especially inside which makes the image clear and easy to see whats going on in the shot.
Sound- I also learnt how to improve the sound in my production with the use of a gun mic
 which aims to stop unwanted noises such as if I was filming outside the wind could be stopped as it is used mainly to capture dialogue or loud noises such as maybe a door slamming, to get this effect I would simply have to get the mic as close to the person or object without it being shown in the shot. To capture good quality dialogue or sound.
Editing- We then began to edit our foota
ge to make a sequence we used transitions, the slice tool to get the better parts of footage to connect with the next shot which will be needed in my actual production. Me and my partner Aaron began to add some music from gladiator to make the footage come to life and discovered how much music gives to the final output to make it lifelike. This affects my production as I will need music to represent the different moods in the trailer.
But later we created a trailer for the existing film Gladiator using the actual footage, we experimented by adding interviews from the director and cast, but also trying to add sound in the background quietly so we can still hear the people talking in the interview this will help with my production because mine will have a lot of dialogue to represent the characters feelings being stuck in eachothers bodies. I also learnt that you could speed up and slow down certain footage to create an interesting effect such as in my production I have a shot of zooming into a characters mouth when screaming I could speed this up to prevent too much time on that scene.
But later we created a trailer for the existing film Gladiator using the actual footage, we experimented by adding interviews from the director and cast, but also trying to add sound in the background quietly so we can still hear the people talking in the interview this will help with my production because mine will have a lot of dialogue to represent the characters feelings being stuck in eachothers bodies. I also learnt that you could speed up and slow down certain footage to create an interesting effect such as in my production I have a shot of zooming into a characters mouth when screaming I could speed this up to prevent too much time on that scene.
Trailers- I learnt quite a lot during the Teesside media workshop because I have never created a trailer before so now I have some idea of how to make it exciting and well presented. The key components I should consider when editing are sound, speed, transition and effects. Sound will improve the emotion of my work making it more real but also display the feelings and emotions in the scene. Speed and length of particular shots are important as I want to make the trailer exciting and not long and boring. Transition is another important idea when editing the trailer as I need to know how scenes are going to lead to others smoothly. If I need any effects such as brightness, black and white etc, if I need to improve the quality of the film I can easily do this in the editing phase. I may include some test shots in my blog and focus group to get comments on how to improve shots and what else can be added to make them look better.
Video editing exercise
During the making of the video edit I learnt how to log and capture my work correctly and how to set the scratch disks so my work wouldnt get lost and I would have to start all over again. I also learnt how to cut clips to take out the unwanted parts I did this by alligning the cut tool to the footage and clicked then deleted what I needed to.
I also learnt how to add music to the footage by importing the file and rendering it, but also if I want dialogue to be heard I could adjust the sound at the appropriate times.
This will help me with my trailer as I never used final cut before so I know have some basic skills to help me make my trailer more professional.
ge


